2nd Step: Attach the new fabric and…done
The next step is also the last step. It is probably the hardest part, but after that it is finished. Now, the chair will be covered in a new fabric…maybe it’s not really new, but I am sure, it’s better than the one before. You can basically use any fabric you want, BUT use a fabric that is not elastic! Usually, those fabrics are not very resistant and it is very complicated to attach them (you will understand later). If you are not sure whether you can use a fabric or not, you can ask/look for upholstery fabric.
What you need:
- cutter
- stapler for furniture
- the fabric you want to use
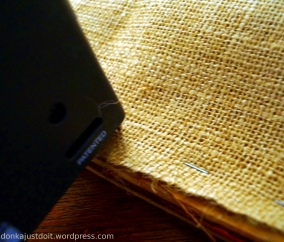
- jute fabric
- foam (I used 5cm/2 inches thick)
- upholstery adhesive
- small nails (maybe the ones you have left from the first step)
- hammer

First, I used the jute to make a basic. I fixed it with the stapler on the frame. It doesn’t have to look very good as you won’t see the fabric after you are finished. But make sure to attach the jute quite good to the frame. The jute is very useful, because the foam has to be adhered to the chair frame and this is easier when there is a fabric or something the foam can easily stick to.
After that the upholstery glue is needed. I don’t know which one you will use, but the one I use adheres really good. It is a spray can, therefore it is easy to apply. Before you use it, shake it. And you should open a window or generally go outside. The glue I use smells like typical industrial glue and after a while inhaling it, I usually feel a bit dizzy. However, apply the glue on the jute and the foam. The foam will be cut later, so you only have to make sure to apply the glue in the size of the chair frame. After the glue is on both pieces, wait for a while. The glue will stop smelling as strong as in the beginning and this prevents that the chair will smell like glue after it is finished. And another nice effect is that both pieces will stick together very fast as the glue already started to dry.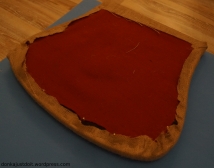
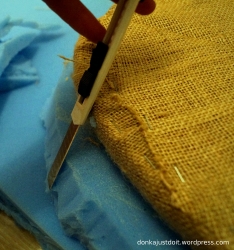
Wait for 5 minutes until the glue is dry. After that you can start to cut the foam. First, do it very rough, but leave a surrounding of at least 5 cm (1,96 inches). Next, you have to cut it in a special way: Position the cutter in a certain angle to the frame (see picture). The idea behind is the following: When you will bring the fabric on the foam and stretch the fabric around the frame, the foam will sink in direction of the fabric. If the foam is too “short” on the edge, the frame won’t be covered and it might be that the person who sits on the chair feels the edge of the chair frame. To overcome this, cut the foam with a certain angle and the foam will be big enough to cover the edge without being too much.
Now, the last part begins: Bring the fabric on the chair! When you have chosen a fabric with a certain pattern or design, you should ensure that it is in the centre of the foam. (you can use a pin to fix the centre of your design/pattern on the centre of the foam) It is easier when you have a plain-coloured fabric. I used the nails from the step before, if you don’t have the nails left, you can buy some new. You should take care of the length! If not, your guests might got bitten by them 🙂 However, you can also use the stapler to attach the fabric. In my case, fabric plus jute was too thick and the stapler was too weak.
Start to stretch the fabric on one side; not too strong. Use the nail or stapler to attach it. Next, attach the fabric along the edge; I put a nail every 2 cm (0,78 inches). Leave the
 corners open! Skip to the facing side and stretch the fabric and fix it in the middle of the edge. Make sure that the fabric is really really taut. After you are finished with the edges, you can start with the corners. That’s very tricky and hard to explain. Usually, there is too too much fabric, so cut them. When you have a look on other chairs, you can see that there is a small “wrinkle” in each corner. Put one side of the fabric down and the other as a layer above and fix the fabric. After finishing the last corner you are ready and can put the frame on the chair. Don’t worry if the frame doesn’t seem to fit: just have a seat and the frame will snap into the chair.
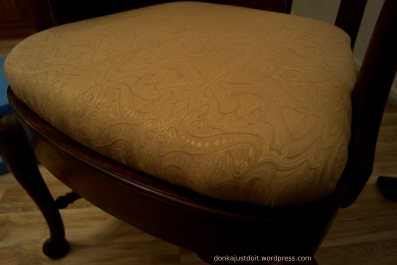
GOOD JOB! Well done and HAVE A SEAT!
